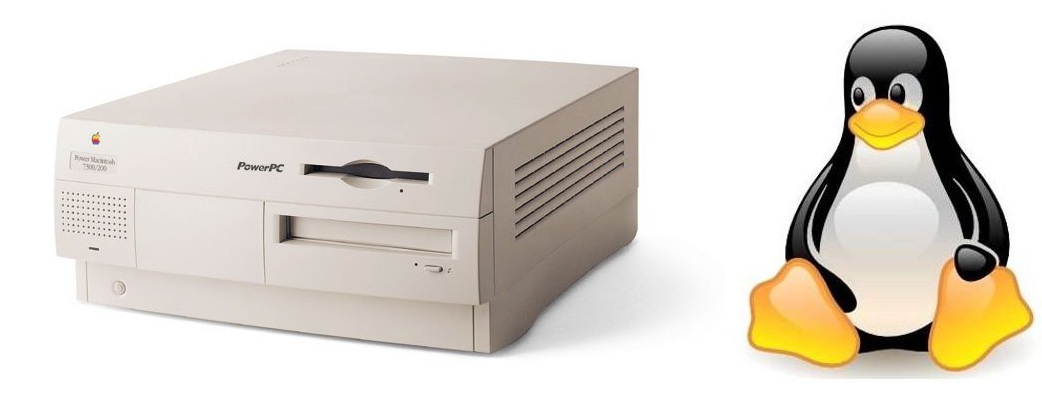
…or should I have titled this “Misadventures with Linux…”? Carrying on from my last post about my newly acquired Power Macintosh 7300/200, you may recall that the 7300 arrived containing a second hard drive, which seemed to have a full install of Debian 3.0 GNU/Linux on it. It would boot all the way to the login in prompt, but at that point I was stuck. The eBay seller was not the original owner and there was no way to recover the userids and passwords for the machine…. hence no way in!

This set me off on a hunt for a Linux Live CD that I could boot from the 7300’s CD drive, so that I could at least examine the files on the second hard drive and see if there was anything of interest there before I reformatted and repurposed the drive. Linux Live CDs for Old World Macs are in short supply, and so I broadened my search to ANY Linux CD that I could get to run on the machine. Most install CDs seem to eventually get you to a Linux shell (a command line prompt, for those of you who may not be overly schooled in Unix/Linux) and this would be as good as a live CD for my purposes.

I tried a lot of Linux distros and a lot of different techniques and eventually, after much persistence, was able to get a look at the contents of the mystery second drive. At the more or less successful conclusion of this effort, I was rewarded with pretty much nothing – two user accounts, both of which were essentially empty, except for a few small test files. The original owner had obviously experimented with Linux on a Power Macintosh, didn’t find it to his/her liking and moved on. Oh well…
So, how did I finally gain access to the mystery drive? Here goes…
Let’s start with the obvious stuff. Setting aside Live CDs, in my last post, I mentioned that I had found a Mac OS 9 driver for ext2, the most common file system in the Linux world, and thus the most likely candidate for the file system on the mystery drive. Conceptually, this should have been the easiest solution. Install the right system extension, restart the Mac and the second hard drive should show up on the desktop. Right?

Wrong! I unpacked the Mac OS 9 ext2 driver (MountX), installed the extension into the system folder and restarted the machine with high hopes. Nothing, Nada, Zilch. No new disks showed up on the desktop. I could see the new extension load as the system came up, but it did not seem to do anything useful (or perhaps I just don’t know how to use it – there was no user documentation with it).
At the time, I thought that perhaps the file system on the mystery disk wasn’t ext2. There are other, less commonly used file systems in the Linux world. Maybe it was one of those. However, as my later efforts finally showed, the file system on the mystery disk *is* ext2, so I am not sure why the Mac OS 9 driver for ext2 did not do anything useful with it. With regret I scratched this easiest and most direct of solutions off the list. This was the first of a long and frustrating series of failed efforts to gain access to the second disk.

On to the live and install CDs. A little searching around on the web revealed a decent assortment to try from. Regrettably, none of them worked out.
I started with Debian, since Debian 3.0 was what was on the machine already. In this case, I tried Debian 7.5 (Wheezy). The installer started up just fine, but quickly exhausted the available RAM on the 7300 (280 MB), threw out about a dozen “out of memory” error messages, and then progressed to the inevitable kernel panic and ensuing freeze. So much for Debian 7.5! I *am* going to try it again however. I have another 256 MB of memory for the 7300 on order. Once installed, I will try Wheezy again. With more than 512 MB to play with, perhaps it may just find enough room to crunch along. We shall see!
My next thought, Yellow Dog Linux, is an old PPC Linux standby and thus a great place to start. No joy there though… all of the current disk images are DVD sized, and my 7300 only has a CD drive. Scratch Yellow Dog Linux.

That was it for the “obvious” choices, so I moved on to the second set of candidates. The T2-8.0 distro caught my eye and so I burned their ISO to CD. Nope. Wouldn’t boot from the CD. Scratch T2. Finnix? Nope. I burned their ISO, and it actually started right up, but it quit almost as quickly. It claimed that it couldn’t find the CD-ROM after it had started to boot … from the CD-ROM!! Doesn’t anybody test this stuff? Scratch Finnix. MintPPC Linux? Another blank CD-ROM, other ISO burned. This one looked promising. It booted right up from the CD and started to run. Unfortunately, it failed some time later, at the “Detecting Hard Drives” stage, claiming it couldn’t find any hard drives. Oh well…
By now I was beginning to wonder if ANYTHING would successfully run Linux from a CD on my poor old 7300. Happily, my penguin in shining armor showed up in the form of Ubuntu 5.10, “Breezy Badger” (Ubuntu uses cutesy names like this for all of their releases).

Breezy wouldn’t boot either, but by now I had learned a trick that I will explain in my next post, which allows you to at least start the boot process for almost any PPC Linux distro on an old World Mac. Using this trick, the Breezy installer chugged into life and started to run. I kept expecting it to fail at any minute, like all those before it had, but it huffed and puffed and kept on going. Finally, I had to stop it – it was an installer after all, and I didn’t want to overwrite what was there on the disk, I just wanted to see what it was! Happily, the Breezy ISO had a “Live CD” mode, and by restarting it with a few cryptic incantations added to the kernel boot command, I was able to eventually arrive at a running live Linux CD! Finally, Linux, alive and well and running from the CD drive of my Power Macintosh 7300!

After much poking around, I discovered that my “mystery disk” was recognized as “/dev/sdd2” and I mounted it. In this case, the “mount” shell command revealed that /dev/sdd3 had been mounted as a swap partition, and so I knew right away that /dev/sdd was the mystery disk. It took a few more trial mount commands to find the right partition, but very quickly I tried /dev/sdd2, and it worked. Since the installer auto mounted /dev/sdd3, why didn’t it do the same for /dev/sdd2? I am guessing that the /dev/sdd2 filesystem, having not been checked (e2fsck) for so long, was marked as “dirty”, and thus the installer did not auto mount it for that reason. No matter why, there it was, mounted and ready for examination.
Voila! A fully intact ext2 file system bearing the Debian GNU/Linux 3.0 environment whose login prompt had defeated me only a week or so before. Sigh… as I mentioned above, all of this effort came to no useful end. There was nothing of interest on the (now not so mystery) disk at all. However, now I know, and I can happily wipe it clean and move on.

Back to “the trick”… I am sure that you good folks would like to know what it is. Stay tuned; that will be the topic of my next post. This post has gone on quite long enough I think. Hint: the trick involves a venerable and unsupported piece of Mac OS software called BootX, which allows you to boot a Linux operating system from the safe harbor of a running Mac OS system. Full details in my next post.


This has my funsies with Linux on a G4 Quicksilver beaten hands down. Kudos for persistence!
(I did, incidentally get Debian Squeeze running as a daily driver on that machine… later on some Mac “experts” told me it couldn’t be done ;))
Hi, glad to hear that you prevailed over Debian Squeeze! This reminded me that I also tried Debian, since Debian 3.0 was what was on the machine already. In this case, I tried Debian 7.5 (Wheezy). The installer started up just fine, but quickly exhausted the available RAM on the 7300 (280 MB), threw out about a dozen “out of memory” error messages, and then progressed to the inevitable kernel panic, and following freeze. So much for Debian 7.5! I *am* going to try it again however. I have another 256 MB of memory for the 7300 being delivered on Friday. Once installed, I will try again. With more than 512 MB to play with, perhaps Wheezy may just find enough room to crunch along. We shall see! Thanks for you comment!
Good luck!
Running a New World box really is a luxury when you want to run a PPC Linux. Aforementioned Mac experts told me Yaboot was a nightmare to set up. This was once I’d done it of course. It was actually pretty straightforward.
Actually I’m a little bit ashamed. Since my Debian Squeeze adventure I acquired a new(er) computer – a refurbed Dell Inspiron 6400 laptop that shipped with XP – and that became my Debian machine. It still is. The G4 is sitting turning into a dust farm when it isn’t running OS X Tiger and functioning as a glorified placenta for my iPod.
I’m thinking about going hog wild and installing a BSD on it. Reading about your pre Intel Mac adventures is an inspiration so thankyou!
“Yes, this is Debian Linux 6.0.7 running on a PowerMac 7200”: http://www.insentricity.com/a.cl/198/PowerMacHack
Thanks to Igor posting a link to my blog Insentricity and you commenting over there, I found this article. There’s one more thing you can do if you’re able to access the Debian disk if you haven’t wiped it already: You could use a text editor to remove the password on the root account from /etc/shadow. Once the password is removed you can log in as root and set a new password.
Thanks for the comment Chris. Happily, I have not yet wiped the second disk and I will try out what you suggest. I did try something like this for the two user accounts. I simply deleted to end of line the encrypted password for each of these accounts. I am not sure if I did this in /etc/passwd or /etc/shadow. No matter, it did not have any effect – I still could not log in to either account, and so I did not try it with the root account. In this case, I will try two things with root: (1) same as the above, but with /etc/shadow, and (2) delete the entire line for root from /etc/shadow and see what happens. Thanks again for the very helpful tip!