Over the years I have authored many pieces in this blog related to the recovery of seemingly dead Macintoshes. These stories have almost almost always had a happy ending, with the machine in question restored to full and useful life.
I find myself in the middle of yet another “recover a dead Macintosh” scenario, and this time the machine is vigorously resisting all efforts at recovery. Discouraged but persistent, I will soldier on, slowly eliminating everything that I can. Ultimately however, I am not a hardware engineer, and I lack the essential tools to debug circuit packs, particularly motherboards.
I am starting to worry that this particular machine may outfox me in the end.
The machine in question is a Quadra 840AV that has been troubled since I purchased it many years ago as a source of spare parts for my “main” Quadra 840AV. It has been intermittent at best, only occasionally booting when powered up. I recently decided that the time had come to determine the cause of this erratic behavior and cure it.
I have run through my standard gamut of “tricks”: complete disassembly and rebuild, reseating of both the RAM SIMs and all the cards, thorough examination of the motherboard to detect any leaking caps or other damage that could be repaired, replacement of the (quite dead!) motherboard battery and more.
None of these has seemed to have any effect. The machine powers up when the front panel power button is pressed (or the power key on the keyboard is pressed), the front panel power led shines forth and the hard drive spins up, but that is it. It never gives a start up chime, it never accesses the hard drive and it never attempts to boot.
I am now running through some power supply based mechanisms for resetting the PRAM, and tinkering with RAM configurations. I haven’t given up on this machine yet, but I am getting discouraged. I will post another update here when I either beat this beast into submission or call off my efforts. Stay tuned!
Two posts ago I introduced retro-computing.com, a new software repository and blog covering the full gamut of retro-computing, from the 6502 to Pentium IV, as the site header says.
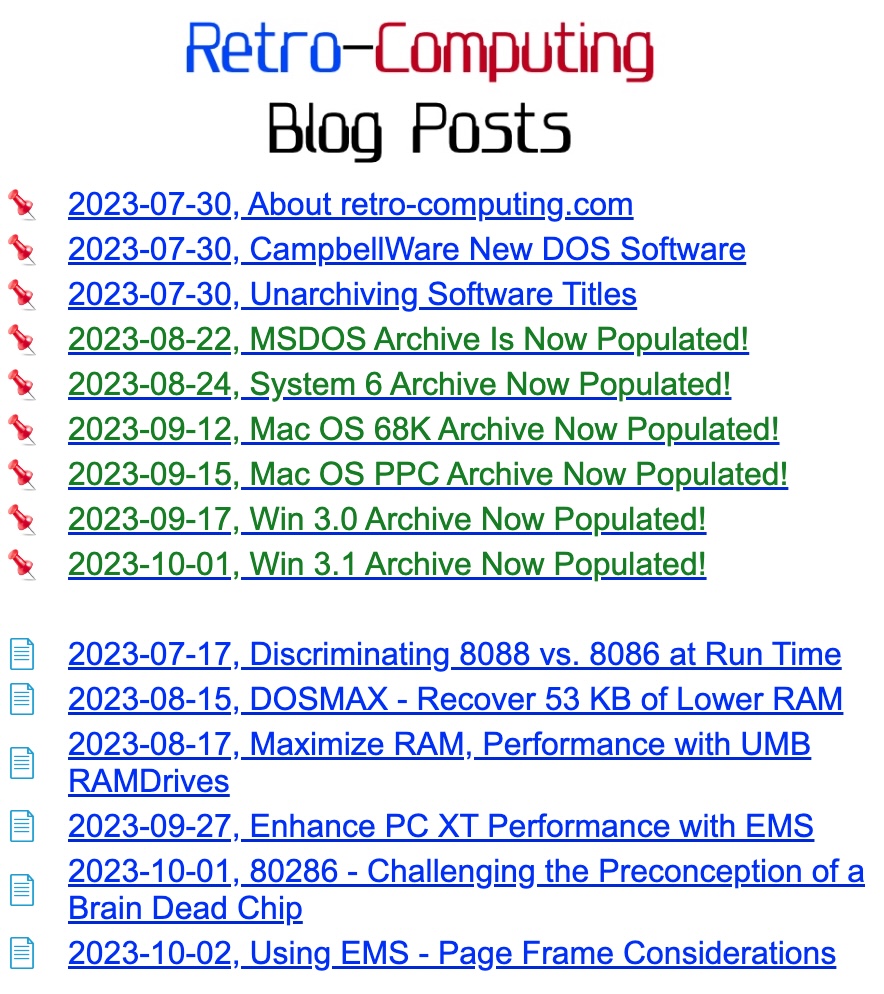
At the time of my original post, retro-computing.com had just launched and had limited content. At this point however, all of the Macintosh-related software archives have been fully populated and are available for your download usage. The archives are:
Macintosh System 6: 68K titles that are known to run successfully under System 6
Mac OS 68K: System 7 through Mac OS 8.1 software titles that are 68K compatible
Mac OS PPC: System 7.1 through Mac OS 9.x software titles that are PPC compatible
Pictured below is screen shot of the start of the Mac OS 68K archive:
Still to come is an archive dedicated to Mac OS 9.x specific titles, and another dedicated to the Apple IIGS. I will post again as those repositories are also populated.
For those of you who may also enjoy the PC side of retro-computing as well, you will also find multiple PC-related repositories fully populated and available for download:
MS-DOS: PC titles that run under MS-DOS, IBM PC-DOS and FreeDOS
Windows 3.0/286: PC titles specific to Windows 3.0 on a 286 (Real and Standard mode only – no 386 Enhanced mode)
Windows 3.1: PC titles specific to Windows 3.1 and WFWG 3.11, all Enhanced mode programs
There are also multiple PC-related blog posts at this time; no Macintosh or Apple IIGS ones yet, but that it simply a matter of time.
In Networking an Apple IIGS and a Mac with LocalTalk, I discussed the issues I encountered getting an Apple IIGS and a Mac, both on the internet, to network via EtherTalk and AFPBridge. Being wholly unsuccessful in getting this to “go”, the above post moved on to accomplishing the same task via the infinitely slower LocalTalk.
This post brings this story to a happier conclusion. In the end, we were able to get our Apple IIGS to network with our G4 Cube via AFPBridge. The obstacle that prevented this when it was it was first attempted turned out to be trivial… something REALLY obvious had been missed!
So, to network an Apple IIGS and a Mac via EtherTalk/AFPBridge, get AFPBridge and install it onto your Apple IIGS. AFPBridge can be downloaded from https://sheumann.github.io/AFPBridge/. This installs a new AFPMounter Control Panel, from which you can configure AFPBridge connections. Next, install Marsha Jackson’s patched AppleTalk CDEV. This can be had at https://peterwong.net/files/apple2/Asmj21h.shk
That’s it! You are all set on the Apple IIGS end!
On the Mac end, we need to start by acknowledging a significant restriction: AFPBridge can only connect to Macs running Mac OS 9.x. In the case of the Happy Macs lab, that restricted the pool of available Macs to our G4 Cube, and hence that was the machine used as our test Mac.
On that Mac, enable File Sharing and ensure that the volume you plan to share with the Apple IIGS via AFPBridge has Sharing enabled. To allow sharing of a whole volume, click the “Share this item and its contents” check box for the volume itself (File, Get Info, Sharing…). File Sharing MUST have something to share in order for AFPBridge networking to work. THIS was the “obvious thing” that was missed the first time this was tried, and it was for that simple and silly reason that AFPBridge would not connect.
You are now all set on the Macintosh end… let’s network these two machines!
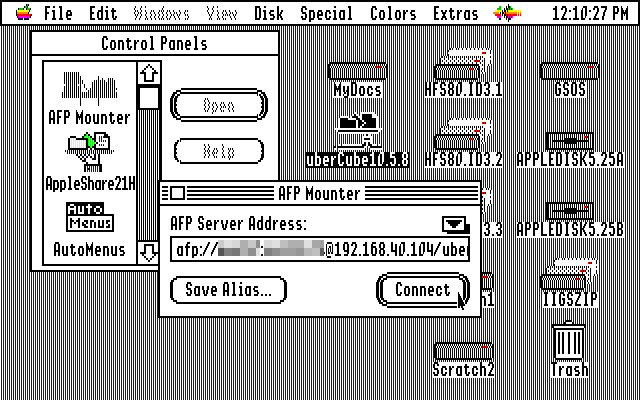
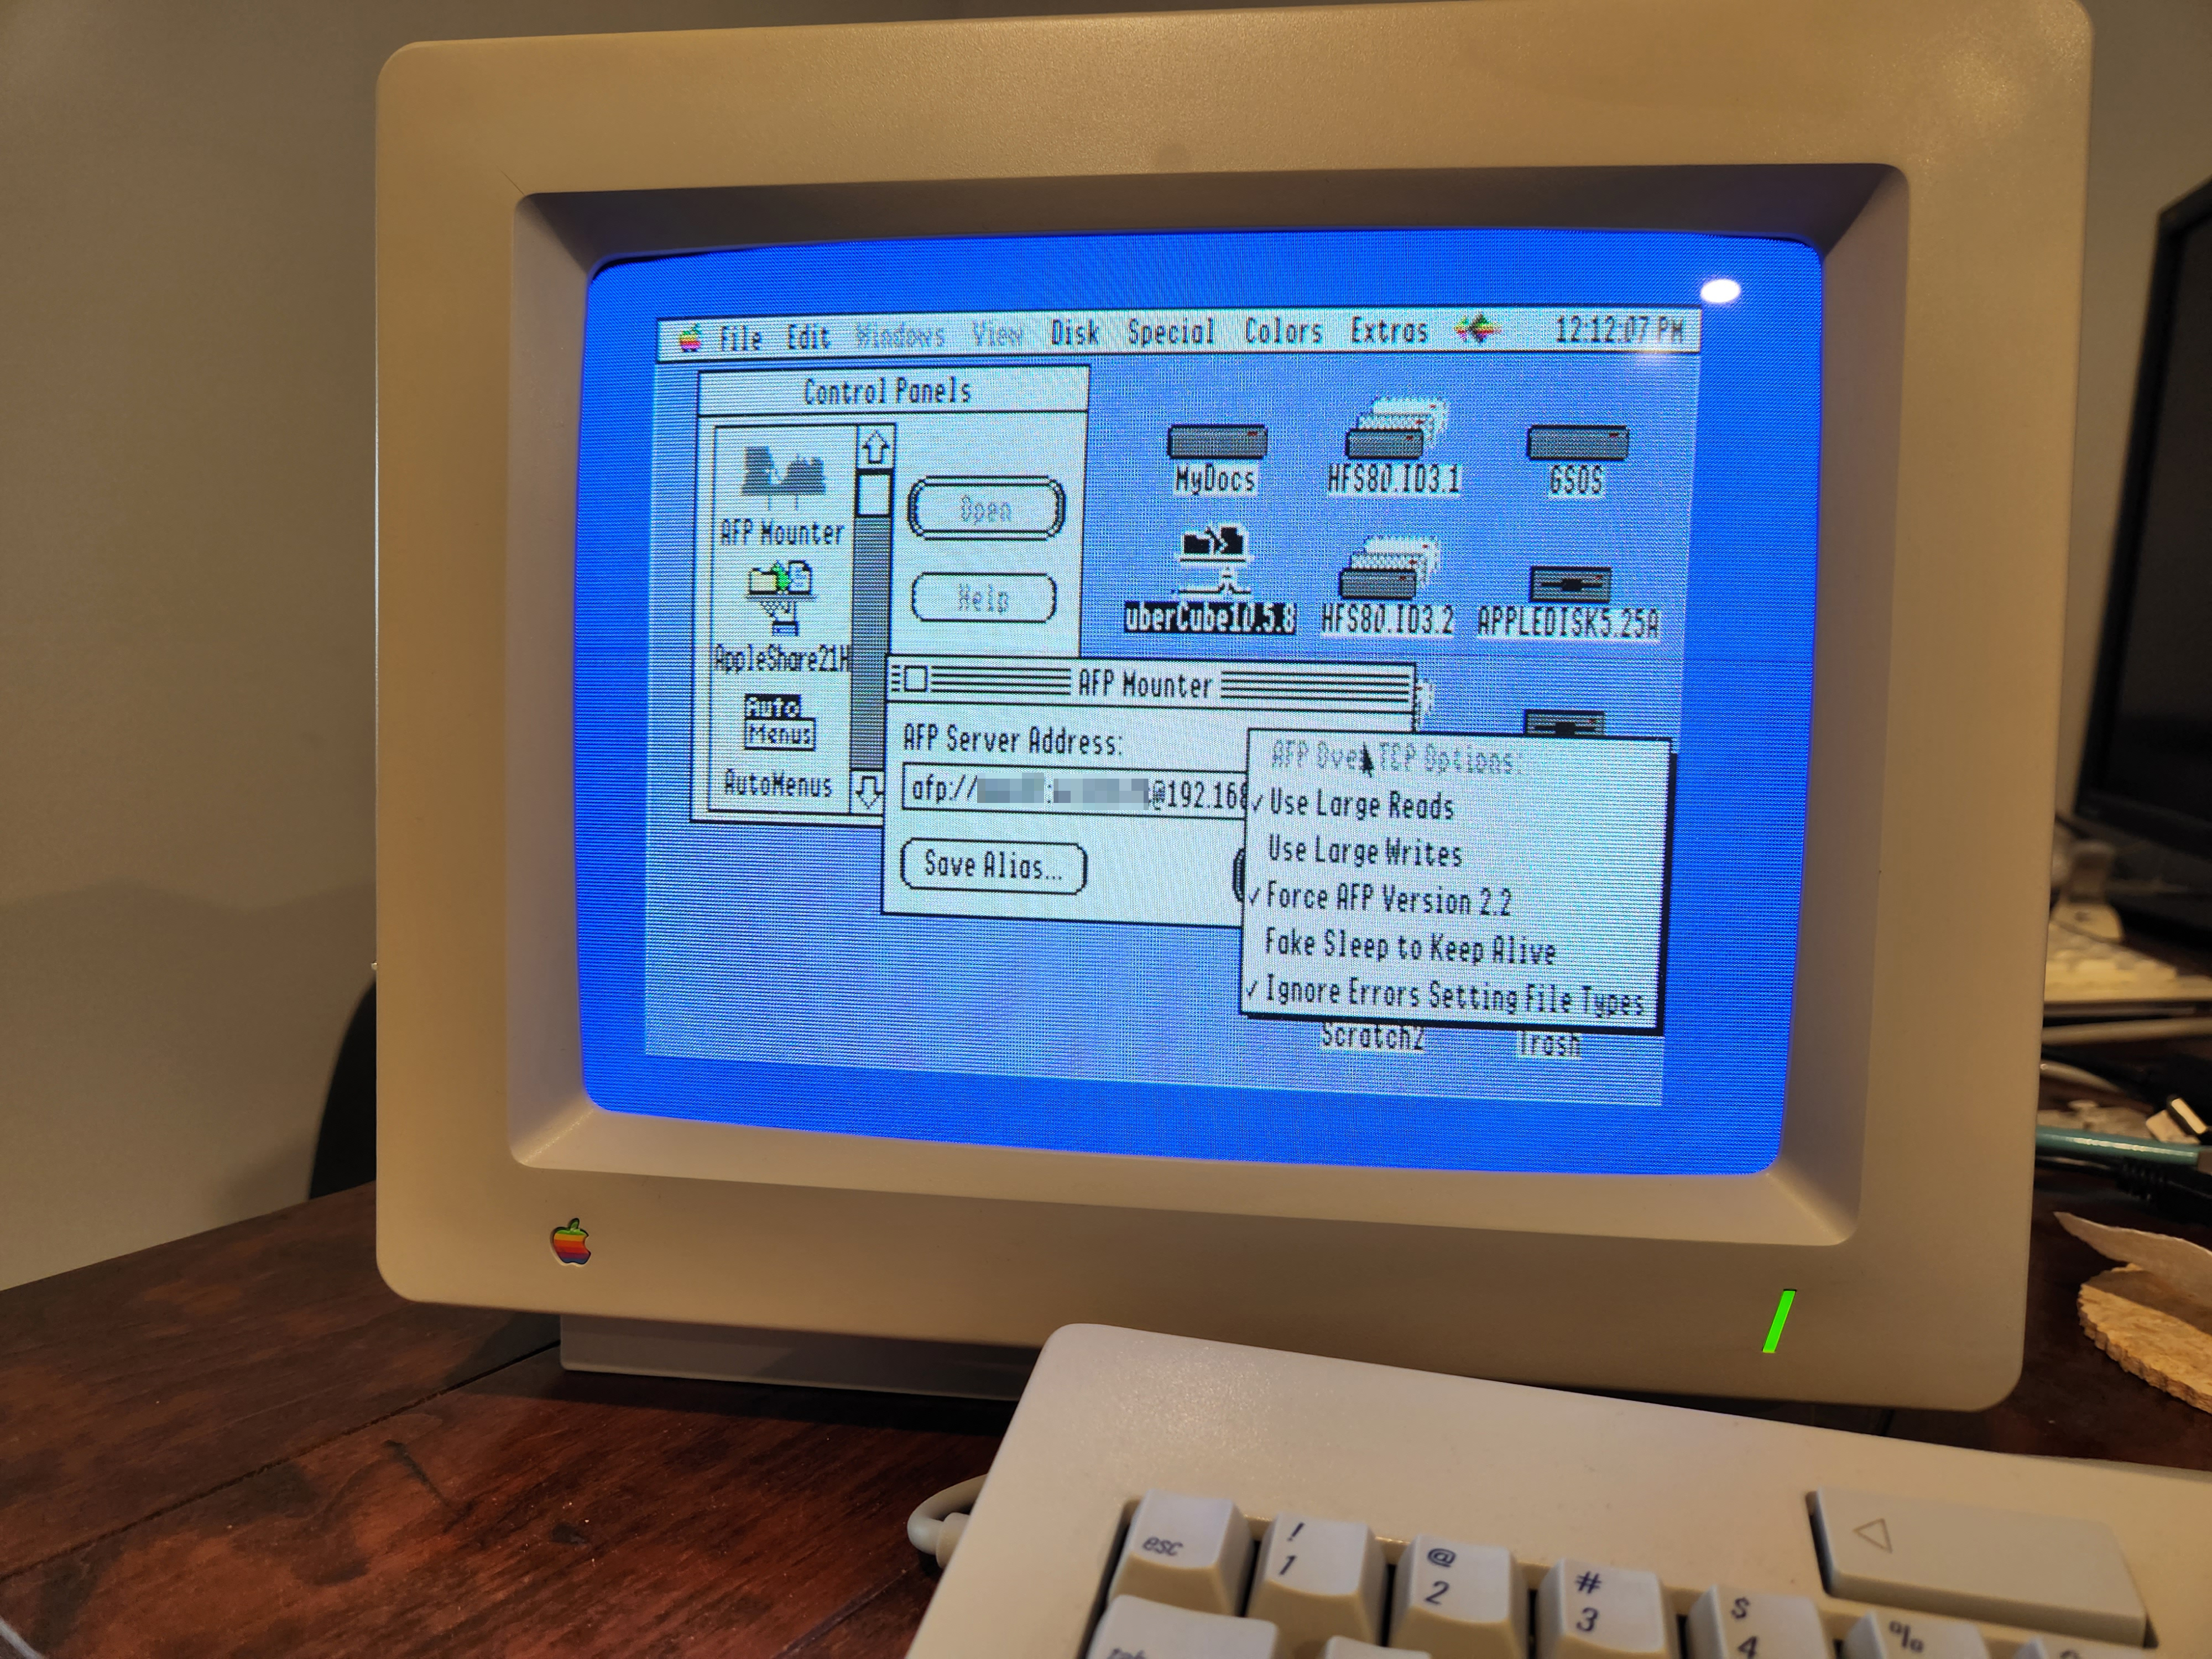
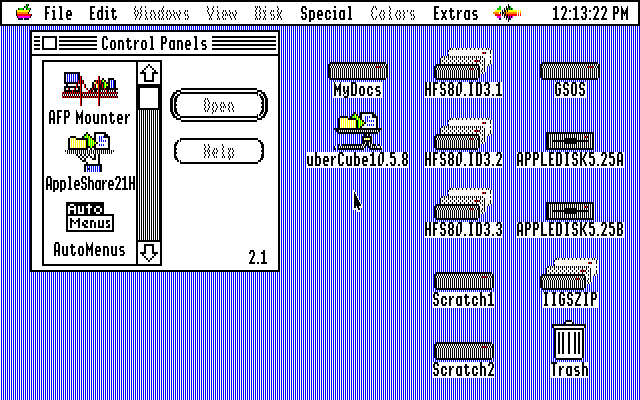
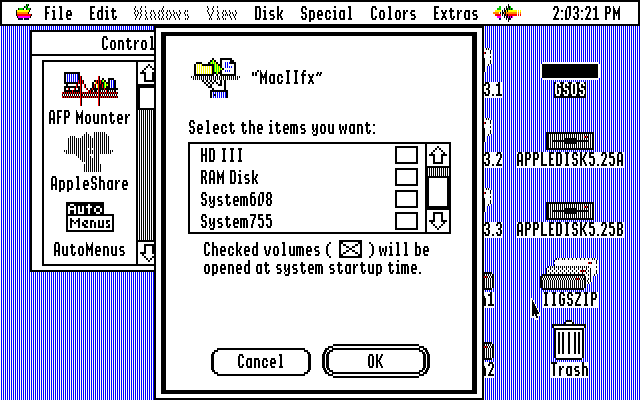
On the Apple IIGS side, open the AFPBridge Mounter control panel.
From the dropbox in the upper left of that control panel, select options “Use Large Reads”, “Force AFP Version 2.2” and “Ignore Errors Setting File Types”, per the screen shot below:
For the server address to connect to, type in: “afp://username:password@IP-address/volumename” as shown in the below screenshots. Two are included below so that the address box could be scrolled over for the second screenshot to show the full URL that was entered.
That is it! With that done, click the Connect button and the selected volume mounts on the Apple IIGS desktop and can be used from the Apple IIGS Finder to copy files in either direction.
The same is NOT true in the inverse. APFBridge does not include an AppleShare server and so while the IIGS can “see” the Mac, the Mac cannot select the IIGS in its Chooser. Buyer beware!
So… AFPBridge turns out to be a great way to network an Apple IIGS and a Mac OS 9.x Mac. Just remember to enable file sharing globally on the Mac and then specifically on at least one volume or at minimum, one folder in a volume.
Happy Macs is pleased to announce the launch of our peer blog and software archives at www.retro-computing.com.
retro-computing.com is a new retro-computing online resource that brings together a wide-ranging blog, covering everything from the Apple IIGS/GSOS to the Pentium IV/Windows ME, and a set of 12 software/abandonware archives for [1] Apple IIGS, [2] MS-DOS, [3] Macintosh System 6, [4] Mac OS 68K, [5] Mac OS PPC, [6] Windows 3.0, [7] Windows 3.1/WFWG 3.11, [8] Windows 9x, [9] Windows ME, [10] Windows NT 3.5/3.51, [11] Windows NT4.0 and finally [12] Unarchive Tools, to allow users to unarchive the titles found in the above collections.
Retro-computing.com is part of the inverary.net family of online retro-computing resources, which includes inverary.net itself, this site (of course!), the “Quadras, Cubes and G5s” vintage Mac blog (at happymacs.wordpress.com) and the Happy Macs Gopher space (at happymacs.ddns.net), serving multiple vintage Mac software archives via Gopher (Gopher preceded the web).
At the time of this launch, retro-computing.com is still under ongoing construction, but everything that is there is fully functional. The blog is up and running (and has 9 posts already!) and two of the software archives are fully populated. These are [1] Macintosh System 6 and [2] MS-DOS. All of the remaining archives will be fully populated over time, until all are done.
The Happy Macs Gopher site (point your Gopher client to happymacs.ddns.net) is pleased to announce the addition of a new archive of System 6 specific applications to the set of existing archives already there: [1] 68K up to Mac OS 8.1, [2] PPC up to Mac OS 9, [3] PPC specific just to Mac OS 9 and finally, the (very) small [4] PPC for Mac OS X .
At the new System 6 Archive, you will be able to download over 116 software applications that are known to work on System 6 Macs (by definition, 68K Macs).
Don’t have a gopher client? If you have a vintage Mac, and why would you care about vintage Mac software titles if you did not (?!), download Turbo Gopher from Macintosh Garden, at http://macintoshgarden.org/apps/turbogopher. Install it (v2.0.3 is recommended, and is available at the above URL) and then point it to the Happy Macs gopher space at gopher://happymacs.ddns.net. From there, you can simply follow the gopher links to the Vintage Software Archives and then the System 6 Archive within.
Looking for an easier way to access the System 6 archive? Visit the http://www.retro-computing.com web site, where our new general-purpose retro-computing blog and wide-ranging software archive set is located. Two of its archives are already fully populated and available for use – the same System 6 archive announced in this post is one of them, replicated in the web paradigm. For the curious, MS-DOS is the other fully populated archive.
www.retro-computing.com, under active construction right now, is a new and ambitious retro-computing resource that will be properly introduced in an upcoming post right here at “Quadras, Cubes and G5s”. The website is not yet completed, but everything that IS there is working. Visit and enjoy!
Like early Macintoshes, the IIGS’ can network “out of the box” using AppleShare and AppleTalk. AppleTalk was originally designed to run over LocalTalk, an Apple proprietary serial connection capable of transferring data at a whopping 230 Kbps. This may sound slow, but back in 1986 it was blazingly fast.
In theory of course you can go faster, MUCH faster, if you have your Apple IIGS configured to access the Internet via TCP/IP. See my earlier post on how to accomplish this remarkably simple feat. If this is the case, you should be able to use the AFPBridge software package to bridge AppleTalk onto Ethernet, as Apple did in a more integrated way later for Macintoshes (but never for the Apple IIGs).
Unfortunately, despite great effort and numerous email exchanges with the incredibly helpful and responsive author of AFPBridge, I was never able to get it work. I eventually “parked” this topic for another time and started to concentrate on the native LocalTalk instead.
If you are Linux friendly, and you would like to try your hand at deploying your own AFP server, there is the open source Netatalk package that you can configure for Linux or Mac OS X. Netatalk delivers an AFP 2.0 compatible AppleShare server, but it needs to be built from source and after reviewing the configuration files, I opted not to go that way. You may chose differently, but no matter how you chose to attack it, best of luck with AFPBridge, and let us know if you get it working!
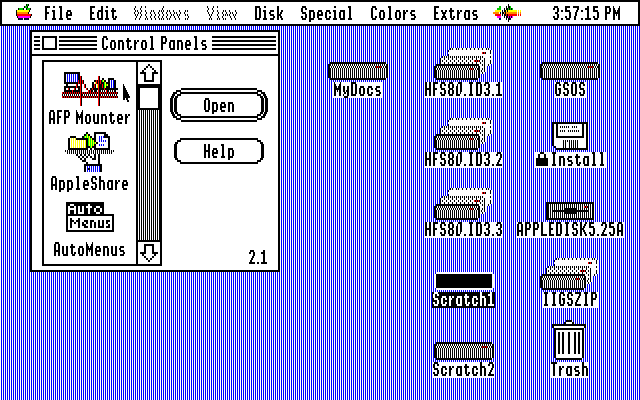
But, back to AppleTalk over LocalTalk. As mentioned above, this is said to work “out of the box”. To enable it, use the GS/OS 6.0.1 install disks, run the installer and select “Customization”. Scroll down the list of presented options, select “Network:AppleShare” and then “Install”. As you can see from the screen shot below, I selected two other options that I thought might be useful at a later time.
Restart (this is mandatory, and the installer doesn’t give you a choice anyway!), then go to the Slots Control Panels and for ROM03, set Slot 1 to “AppleTalk”. Restart again! That is it. AppleShare and AppleTalk over LocalTalk are now active.
The simplest form of an AppleTalk network is a direct connection between two devices, be they two Apple IIGS’, a IIGS and a Mac, or either of those and a Printer or a shared file server. Naturally, this was the first thing I tried. Per my earlier post on networking two Macs over LocalTalk, I went to Amazon and bought [insert cable reference here]. Now I needed an AppleShare server to connect to. Since Apple integrated a basic AppleShare server into all Macs starting with System 7 (Personal File Sharing), any of my System 7 or higher Macs would fill the role of an AppleShare server nicely. I picked the one physically closest to the IIGS in the Happy Macs lab, which just happened to be the Mac IIfx running System 7.0.1 (and dual booting System 7.5.5).
With two LocalTalk-capable nodes and a cable to connect them together, the rest should have been a cakewalk, but it was not. I duly connected the printer ports of both machines (Apple IIGS and Mac IIfx) via the above cable and powered them both up. I systematically walked through all the settings for both machines to ensure that they were correct, and they were. For the IIGS, I verified that Slot 1 was set for AppleTalk in the Slots control panel and that the AppleTalk control panel itself was available. Both checks were successful. On the Mac, I verified that AppleTalk was set for LocalTalk, not EtherTalk and that Personal File Sharing was enabled (enabling the integrated AppleShare server).
With all the preliminaries out of the way, it was show time. I went to the Apple IIGS control panels and selected the AppleShare panel. It came up just fine, but presented an empty pane where any available AppleShare servers should have been presented. The IIGS was clearly not “seeing” the Mac IIfx file server. Oh boy, where to start? Back to “working on mysteries without any clues”? Indeed!
At this point, hoping I was just missing something obvious, I headed over to the “Apple IIGS Enthusiasts” Facebook group and described my problem in detail there, asking if anyone could see anything that was obviously wrong. No one could, but then again, no one seemed to have ever tried a LocalTalk network! With nothing obvious apparently wrong, I went back to the Apple II networking manuals that I had downloaded and read ahead of this effort and scoured them again.
There was ONE thing. For Macs, I had been successful in creating a two node AppleTalk/LocalTalk network by simply directing connecting the printer ports of each machine with a single cable. With this success in hand, this is what I was trying to do with my two node Apple IIGS and Mac networking attempt. However, per the manuals, for the IIGS (and all Apple machines, apparently) I needed something new – a LocalTalk Connector Kit. In fact, I needed two of these connector kits, one of which needed to be installed in front of each computer, with the LocalTalk cable strung between the two connector kits, as shown below:
Now I just happened to have one, but only one, of these connector kits, and I needed two. Happily, they are readily available on eBay for a modest price (you need to watch carefully however; some sellers are asking outrageous prices for these simple kits), and so I selected and ordered another one. When it arrived, I now had the requisite two Connector Kits.
At both the Apple IIGS and the Mac IIfx, I connected the cable of the Connector kit box to the computer and then connected the supplied LocalTalk cable between the two Connector boxes, as shown above.
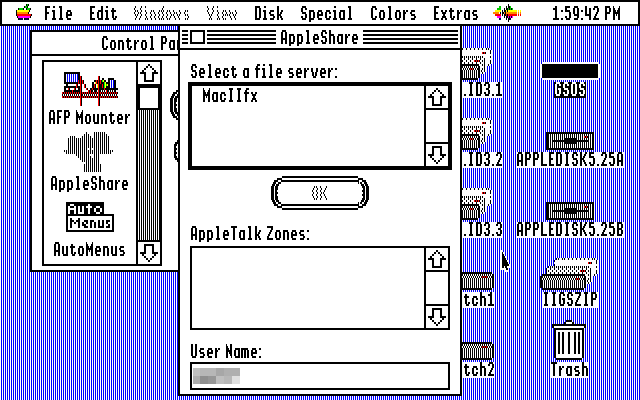
That was it… that was all the magic that was needed. Powering both machines up, Mac IIfx (AppleShare server) first and then the Apple IIGS, I went to the Apple IIGS AppleShare control panel and started it up. Up it came, but for a brief, heart-stopping moment, it again presented a blank pane where any available AppleShare servers should be displayed… then, to my immense relief, it populated the Mac IIfx into the pane! Success!
I was able to select the Mac IIfx and was prompted to log in, which I duly did:
Once logged in, I was presented with the list of available volumes on the Mac IIfx (a large list – the hard drive is partitioned into multiple volumes) and selected the boot volume (System755).
Like magic, the boot volume mounted cleanly on my Apple IIGS desktop and I was able to copy files back and forth freely.
Success was at hand, but while savoring this little victory, I could not help but marvel that this 1986 machine could simply network “out of the box” with “no muss, no fuss”… just connect it up and it worked. PCs of the day COULD network, if you had enormous PC technical acumen and infinite patience, but both were beyond the reach of the average user of that time. It would take the Wintel world another ten years or so to figure this one out. Even Windows 95 took a fair amount of installing and configuring before it would network. The Apple IIGS and the Mac were simply light years ahead of their contemporaries in this area (and many more as well, to my biased mind).
So… want to network your Apple IIGS to others of its kind, or to classic Macs? Drag out your GS/OS install disks, install the Networking selections, get two or more LocalTalk Connector Kits, cable it all up and sit back and marvel at the incredible simplicity with which the Apple world accomplished this technically complex undertaking.
A long time ago, in a land far, far away… before ethernet was widely deployed, Macs were networked via AppleShare over AppleTalk, which itself made use of LocalTalk, a serial connection between two or more Macs, printers etc. LocalTalk was capable of the whopping great transfer rate of 230 Kbps. This may seem slow by today’s standards, but back in the mists of time, when the 1200 baud modem (a glacial 1.2 Kbps!) was the speed king of the day, 230 Kbps seemed blazingly fast!
When my efforts to LocalTalk between my Apple IIGS and a Mac failed miserably, I decided to drop back and make sure I could get LocalTalk to work between two Macs first, thus ensuring that I had a reasonable grasp of what it takes to make LocalTalk go. The simplest form of a LocalTalk network involves just two Macs, directly connected via a single LocalTalk cable plugged into the printer port of each.
Everything I have read said that this was the trivial case; the easiest form of a LocalTalk network that could be put together. Assuming that AppleShare and AppleTalk were already loaded on the Macs, all that was necessary was to connect the Macs together via a LocalTalk cable whose two ends were plugged into the printer port of each Mac. The last step was then to change the AppleTalk connection from “Ethernet” to “Printer Port” and it should just work…
And guess what? …it just did! In a radical departure from the usual narrative of these posts, there were no irrational problems to solve, no major issues to overcome, no new software to load… nothing. It all just worked! How very nice for a change!
The web-based research I did before attempting to connect the two test Macs made it clear that there are a universe of variations on this topic, including the very successful Farallon PhoneNet. In addition, the specific steps to be taken vary based on the version of Mac OS each machine is running, and the exact form of the physical connection being used. So, with all this variability in mind, here is EXACTLY what I did to get LocalTalk between two Macs working.
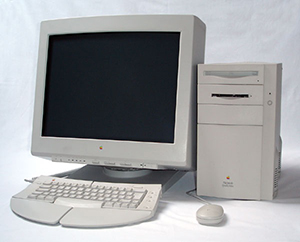
The two machines in question were a Mac IIfx running Mac OS 7.0.1 and a Quadra 840AV running Mac OS 8.1. Each OS version is preconfigured with AppleShare-based Personal File Sharing (a.k.a. AppleShare File Server) and these two Macs are known to network with each other successfully when using AppleTalk over Ethernet (EtherTalk vs. LocalTalk).
I concluded from this that the AppleShare/AppleTalk software was already in place and set up properly. All I had to do was physically connect the two machines, printer port to printer port, swap the AppleTalk connection from “Ethernet” (EtherTalk) to “Printer Port” (LocalTalk) and enable File Sharing. With all of this done, each Mac should “see” the other in Chooser, and each Mac should be able to mount volumes from the other and transfer files.
Let’s decompose this and look at each step. First the physical connection. I got on Amazon and ordered “C2G 02318 8-Pin Mini-DIN M/M Serial RS232 Cable, Beige (10 Feet, 3.05 Meters)”.
Pretty much from the Mac II onwards, the DIN8 connector was used for printer ports, and so this was definitely the correct cable to get, at least from a plug compatibility perspective. With both machines powered down, I ran one end of this cable to each of the printer ports of the two Macs and plugged them in. So far, so good.
The process for swapping the AppleTalk connection to the printer port was different on each of the two Macs due to their Mac OS version differences.
On the Mac IIfx (Mac OS 7.0.1), there is no AppleTalk control panel. Instead, you go to the Network control panel and there select LocalTalk vs. EtherTalk. This accomplishes the switch of AppleTalk from the ethernet port to the printer port.
On the Quadra 840AV (Mac OS 8.1), there IS an AppleTalk control panel. There you select “Printer Port” vs. “Ethernet”, which again shifts AppleTalk over to the printer port of the machine.
Like the AppleTalk port switching, enabling File Sharing was also different between the two machines, again due to their different Mac OS versions.
On the Mac IIfx (Mac OS 7.0.1) I went to the Sharing Setup control panel and turned on File Sharing.
Then I went back to the desktop and selected the boot drive. From the menu bar File menu, I selected “Sharing…” and ticked the “Share this item and its contents” box. This step gave File Sharing something to share!
On the Quadra 840AV (Mac OS 8.1) I went to the File Sharing control panel and again turned on File Sharing.
Then I went back to the desktop, but instead of sharing the entire boot volume, I decided to try something a little more granular, and instead created a new folder called Shared840AV and then shared it using the menu bar File Menu “Sharing…” selection. Again, File Sharing had something to share.
That was it! I was ready to test it all out. On the Mac IIfx, I started Chooser. Once it was up, I was careful to check that the radio buttons at the bottom right were set for “AppleTalk Active”. Then I selected the AppleShare icon from the icon set on the left of the Chooser dialog and boom! …up popped the Quadra 840AV in the Chooser pane where available AppleTalk servers should be presented!
I selected the Quadra 840AV’s boot volume from the presented set of volumes and it mounted successfully on the Mac IIfx desktop. I was able to copy files from the newly mounted Quadra 840AV to the Mac IIfx desktop and visa versa. At this point I will note… yup, it is SLOW! A 230 Kbps link is not much of a speed demon! It took an observable amount of time to transfer 400 KB files back and forth. It was tolerable, but slow by today’s standards.
Now I repeated this whole exercise from the other side. From the Quadra 840AV’s Chooser, I selected the Mac IIfx and then selected its boot volume from the presented list of volumes. Again, I was careful to ensure that AppleTalk was set to Active via the radio buttons in the lower right of the Chooser dialog. Again I was able to successfully “see” the other Mac and copy files back and forth, and again, it was not much of a speed demon while doing it.
So there you have it! Networking two Macs via AppleShare/AppleTalk over LocalTalk… every bit as easy as the material you will read online makes it sound.
One note of caution. Also from Amazon, and from the same manufacturer as the LocalTalk cable used in all of the above testing, I order an extension cable as well, since the two Macs are of such a distance apart that the one cable just barely makes it.
This did not work! When I took the working LocalTalk cable and simply added the extension cable to the end of it prior to use, neither Mac would see the other in Chooser. I am not sure what the issue is but be forewarned. It could be a maximum length limitation, it could be poor-quality cable, it could be both, or it could be something entirely different, but no matter what, using at least that extender cable does not seem to be a good idea, even if using an extender cable in general is a good idea!
And one last caveat. Connecting two Macs directly really IS the trivial case. If you want to create a REAL network, with multiple Macs, and perhaps a printer or two, you will need some LocalTalk Connector kits, one per Mac or Printer on the network. Happily, these are still in ready supply on eBay. The one shown below is one of many presently on offer, but with the distinction of being NOS (New Old Stock) – still in the original shrink wrap.
With that, I will wrap this post up and wish you happy (LocalTalk) networking!
As described in earlier posts, I am relative novice where the Apple IIGS is concerned. I have (literally) decades of experience working with PCs and classic Macs, stretching back farther than I want to admit, but no experience at all with the Apple IIGS. In this strange and foreign world, EVERYTHING is new and NOTHING is known. This can make problem solving very slow and tedious, and often leads you to missing the obvious. That is what happened in this post… I may be slowly climbing the very steep IIGS learning curve, but there is a LONG way to go. Today’s post will demonstrate that in spades.
Today’s topic is Desk Accessories, and how to access them on a IIGS. Like classic Mac OS, the GS/OS operating system supports a limited form of multi-tasking via programs called Desk Accessories. These can be loosely analogized to widgets today – small, single purpose programs that provide a useful atom of functionality. GS/OS is fundamentally a single-tasking operating system – only one application can be running at a time – but a sort of multi-tasking can be had via Desk Accessories. While a primary application is running, users can also activate and use Desk Accessories by dropping the menu bar’s Apple menu and selecting one from the list presented.
As you may guess, this gave rise to an enormous range of VERY useful functions implemented as Desk Accessories: calculators, file managers, tiny word processors, small spreadsheets and so on. The reason I mention all of this is because the screen shot functionality I wanted to add to my IIGS setup came as a Desk Accessory. This perfect sense when you consider when and why you would want to use it. Being delivered as a desk accessory should not have been a problem, but it was. As many of you may already know, but I have only recently learned, there are TWO kinds of Desk Accessory, Classic Desk Accessories (CDA) and New Desk Accessories (NDA). This simple fact caused me no small amount of grief.
It turns out that it is only NDAs that show up under the menu bar’s Apple menu. CDAs show up quite differently, as part of a text page menu that is accessed by simultaneously holding down the Apple, Control and ESC keys. All the documentation I read agreed that this was how the menu was accessed, so I gave it a try. However, no matter what I did with those three keys, the desired CDA menu would not appear. This was a major problem: No CDA menu meant no screen shots. I REALLY needed the CDA menu, but it would not appear as the documentation said it would.
SO coming back to where I started… EVERYTHING is new and NOTHING is known. What was wrong? It could be SO many things! Was there a missing configuration file or an incorrect configuration entry? Was there a conflict with another piece of software on the IIGS that was preventing this keystroke from getting to its intended destination? Was the documentation wrong, and perhaps it was the Option, Control and ESC keys (or countless other combinations) instead? Did I need to do something undocumented in the Slots control panel? Was it the hardware? It COULD be the hardware… I did in fact find an article that pointed me to the S1 jumper on the motherboard; if jumped, this jumper disables access to the control panels and CDAs! In this case, there was nothing on that jumper, but could it be some other jumper on the motherboard? So many possible causes, all new and unknown… Where to even start?
There was no obvious place and so as I often do when confronted with a temporarily unsolvable problem, I “parked” the issue for the moment and moved on to another one (there are LOTS of problems to be solved in a new environment like this!). This turned out to be illuminating. Ultimately, I found myself on another text-based page, in another text-based menu. This particular menu was easy enough to operate: the arrow keys moved the cursor around the screen, the Enter key selected the current entry, and the ESC key exited the menu. This all seemed simple enough, except that the ESC key did NOT exit the menu. In fact, it didn’t seem to do anything at all!
That’s when it hit me. My CDA menu struggle was not caused by some esoteric configuration issue that I had failed to understand… it was simply a bad key on the keyboard! The ESC key almost certainly wasn’t working. Really? Foiled by a simple keyboard failure? Consideration of this obvious possibility had completely eluded me!
Well, this at least was a place to start and so I did. With lots of vintage Macs available in the Happy Macs lab, I had no shortage of compatible keyboards I could try, so I swapped in a different one and rebooted. I then pressed the Apple, Control and ESC keys simultaneously and instantly, up popped the (never before seen by me) CDA menu! It had been a simple keyboard fault all along! Sheesh!
While I was desperately searching for some esoteric point of configuration that I had failed to understand, I had been undone all along by the most obvious of things: a simple failure of just one key on the keyboard!
This whole episode is frustrating and illuminating all at the same time. Without consciously considering it, made the assumption that the hardware was good and that the issue lay in me not understanding something about this new machine. That assumption cost me several hours of time and no small amount of frustration. How often have similar things happened to you? We all need to be on guard against our built in biases and assumptions. Lesson learned. From now on, I will eliminate the obvious first when I encounter new problems on my journey through Apple IIGS land!
I subtitled this post “Working on Mysteries Without Any Clues, Part II”, harking back to my initial post on the IIGS (Adding a ZIP-100). This Bob Seger lyric continues to resonate because it is just SO descriptive of what it feels like to dive feet first into a wholly new computing environment. I am sure that there will be many more such moments in the weeks and months ahead. Stay tuned for a probable “Part III” (and maybe even “Part IV”!) to this series!
As you may be aware if you have read my last two posts, I have been busy upgrading the hardware and software environment of my new (to me) ROM03 Apple IIGS. Along the way, I ran into and eventually came to understand (I thought!) the Slots control panel. As a coarse summary, hardware placed into a slot won’t work unless that slot is set to “Your Card” in the Slots control panel. In addition, AppleTalk and AppleShare won’t work either unless Slot 1 is set to “AppleShare” in the Slots control panel. This control panel is clearly a critical piece of Apple IIGS configuration.
Screenshot from Sweet16 Emulator
As I was working away at getting all the new hardware and supporting software to work (RAMFast SCSI card, SCSI HDD card and a Uthernet II card) I had cause from time to time to use the floppy drives I have attached to the system. I have both a 3.5” and a 5.25” floppy drive attached. I noticed as I tried to use these drives that sometimes they worked and sometimes they didn’t. I did not understand why, but thought “one problem at a time… I will get back to that after I have the rest working”. And so I did…
My IIGS removable media “stack” – 5.25″ floppy, 3.5″ floppy, ZIP-100 drive (Macintosh SE sitting behind it)
I had everything else up and running several days later and turned my attention to the seemingly erratic floppy drives. Thanks to the INCREDIBLY helpful people over at the Facebook “Apple IIGS Enthusiasts” group, and I have been led to understand, and then was able to prove in practice, that the 3.5” floppy is governed by the setting in the Slots control panel for slot 5. The 5.25” is similarly governed by the setting for slot 6.
To use the 3.5” floppy, slot 5 must be set to “Smart Port”. To use the 5.25” floppy, slot 6 must be set to “Disk Port”, both in the Slots control panel. If these settings are not in place, the respective floppy drives simply don’t work! If these settings are in place, they work exactly as expected. Going back to my observations above however, this means that they CANNOT be set to “Your Card”, which in practice said to me that you cannot populate slots 5 and 6 with expansion cards if you want to use both of the floppy drives (and I do)!
This was proven out by my real world experience. When I was first working on the RAMFast SCSI card, I had it installed in slot 6. Slot 5 was free, and eventually I added the Uthernet II card to slot 4. During that period of time, the 3.5” floppy worked; the 5.25” one did not. Eventually, in the course of my work, I rearranged the cards, moving the RAMFast card to slot 5. Slot 6 was now free and guess what? The 5.25” floppy suddenly worked like a champ but the 3.5” floppy was deader than dead.
This was when the good denizens of Facebook’s “Apple IIGS Enthusiasts” group clued me in to the connection between the floppies and the slot settings. Armed with this information, I rearranged my card layout one more time, such that slots 5 and 6 were both free, and both were set to their correct (to enable floppy use) settings of “Smart Port” and “Disk Port” respectively. That is all it took. Both floppies worked perfectly after this change.
It was a hair-raising change, mind you! After I rearranged the cards to accomplish this, the IIGS simply refused to boot, seeming to get stuck somewhere in its internet setup (the boot sequence Time icon appeared and then the boot seemed to get stuck). Leaning on my Macintosh experience, I rebooted while holding down the Shift key and the machine started up without Inits and DAs. Started like this, it booted fully, so I knew that I had a software issue to deal with, not a hardware one, which was a relief.
One small inspiration later and I had a solution. As part of the above card rearrangement, I had moved the Uthernet II card from slot 4 to slot 2. Since part of the software configuration of the Uthernet II link layer involves telling it what slot the card is in, this was clearly now broken. The machine wouldn’t boot, and so I could not change the configuration to match the hardware, so instead I changed the hardware to match the configuration! I rearranged the cards yet again, such that the Uthernet II card was returned to its original slot 4 location and boom! … the machine booted flawlessly.
So, in the end, my IIGS has only three slots open, and two of them have to remain open (5 and 6). The remaining one, slot 3, is typically reserved and kept free, although I have yet to read why. In practice therefore, my IIGS is maxed out on expansion cards. If I ever want to add another, I will have to sacrifice something… a floppy drive, the HDD card… something.
My hardware and software slot arrangement, in the end, is as follows:
Slot 1 – SCSI HDD card (slot is set for “AppleShare”)
Slot 2 – RAMFast SCSI card (slot is set for “Your Card”)
Slot 3 – Open (slot is set to its default “Text Display”)
Slot 4 – Uthernet II Internet card (slot is set for “Your Card”)
Slot 5 – Open (slot is set for “Smart Port”, enabling the 3.5” floppy drive)
Slot 6 – Open (slot is set for “Disk Port”, enabling the 5.25” floppy drive)
Slot 7 – Turbo IDE card with CF card boot volume (slot is set for “Your Card”)
Startup is set to “Scan”.
All of the above slot settings are in the Slots control panel.
In summary, what I have learned is that if you wish to use an external 3.5” floppy drive, keep slot 5 free and set it to “Smart Port” in the Slots control panel. If you wish to use an external 5.25” floppy drive, keep slot 6 free and set it to “Disk Port” in the Slots control panel. If you wish to use both floppies, keep both slots 5 and 6 free, and configure them in the Slots control panel as “Smart Port” and “Disk Port” respectively.
That is more fun (?) than I planned to have with floppies on this machine, but it is done, and I am a little further up the IIGS learning curve. I hope that this post may be useful to other IIGS newbies like myself.
Next up? I have come across some IIGS “beautifications” that I want to apply (desktop images, nicer icons, etc.) and have also come across the unofficial GS/OS 6.0.4 upgrade. And when all of that is done, it is time to move on to installing and using Orca/C. Even further out may be GNO/ME. Plenty more to come!
Getting a vintage machine like the Apple IIGS onto the internet should have been a herculean task, but it wasn’t – it was a cakewalk! If you are interested in getting your Apple IIGS onto the net, read on. It is not nearly as hard as it might seem. This is thanks to some well executed hardware from A2 Retro Systems (Uthernet II) and some equally well-crafted software from the Marinetti Open Source Project (Marinetti TCP/IP + apps). I suspect that these two names will be familiar to most Apple IIGS aficionados.
My research on the web consistently pointed me to the Uthernet II card as the network card to get, and the Marinetti TCP/IP stack as the software to drive it with. These two, so my research said, were smoothly integrated and would just work. This all sounded far too easy, but in fact it really was pretty much that easy.
There are of course other network cards and other TCP/IP stacks, and so there are almost certainly many other ways to accomplish the task of getting your Apple IIGS onto the Internet. However, if you would like to follow the approach taken in this post, the prerequisites for getting your Apple IIGS on the Internet are:
Uthernet II card
At least 2MB of Apple IIGS RAM – this is required by the Uthernet II card. If you do not have any additional RAM in your IIGS, you can buy a RAMGS expansion card (4 MB or 8 MB) from Amazon, eBay and many other places. See Purchasing GGLABS products | gglabs.us for full details. Just to be clear, I have no affiliation with GGLabs whatsoever. I am just a satisfied customer.
Marinetti 3+ software
Getting the Uthernet II card was the easy part. They can be ordered from a2retrosystems.com and I had done so quite some time back. Getting the Marinetti software was not that hard either, but it did present some challenges to a new Apple IIGS user like myself. It was available from many places, and in two formats. The first was a (to me) new and mysterious format, a .po file. This was apparently completely preconfigured and absolutely the way to go. The second was a .SHK file, a format I was more familiar with. I read that this file might need a little more configuration than the .po file to deliver the intended result and so in the end, I went for the mystery .po file. I downloaded the file from a2retrosystems.com’s Marinetti download page, getting Marinetti3.0b11.po.
OK, so what was a .po file and how did I open it and use its contents? More Google’ing revealed that .po stands for “ProDOS Order” and that it was a ProDOS disk image. This image could be mounted on the GS/OS desktop and used directly as if it was a real disk. The only problem was that I could find no description of HOW to go about mounting it. Back to Google. Eventually, I ended up at Brutal Deluxe Software, and downloaded their MountIt package. This claimed to be able to mount most common disk images, including .po.
Regrettably, MountIt downloaded as a .po file! Apparently I needed to have MountIt already installed in order to unpack and install it! This was an obvious Catch-22 and clearly a dead end. There was also the above-mentioned .SHK file, and I downloaded that too (not that I knew how to unpack .SHK files either!).
At this point, dim memories of a program I had played with in the past, called CiderPress, came to mind. I remembered that it was pretty good with obscure archive file types and I Google’d around to find it. It seems to be a Windows-only program, which is odd for a program that works with Apple disk images, but there you go! The world doesn’t always have to make sense… in fact it rarely does!
I downloaded and installed CiderPress on a Windows 10 PC I have available and then downloaded both MountIt and Marinetti again, this time onto the PC vs. the Mac I had originally downloaded it to. I then pointed CiderPress at the MountIt .po file and it opened it right up, “no muss, no fuss”. I extracted all the files and copied them, along with Marinetti, over to a Mac in the Happy Macs lab that is equipped with an external ZIP-100. From there I copied the files onto that ZIP-100 and transferred it to the ZIP drive now successfully working on my IIGS (see my last post for details of how this was accomplished).
The next few steps were pretty straightforward. I installed MountIt and then restarted. It presented a unique start up icon and so I felt confident that it had installed, but there was no other trace of it… no control panel, no application program, nothing. But it was there; I had seen it at startup. So, I navigated the GS/OS Finder over to the ZIP-100 disk and double clicked on the Marinetti .po file. Sure enough, the .po file mounted as a new disk on the desktop. I could open it and work with all the contents as expected. Excellent! MountIt is a winner!
At this point, it was time to return to the hardware. I unpacked my Uthernet II card, which is surprisingly small, selected a slot for it (4 in this case), and plugged it in. I was careful, per the manual included in the shipping package, to ensure that the Uthernet II RJ-45 connector was pointed towards the front of the IIGS (i.e. towards the keyboard). I then removed one of the slot barriers at the back of the machine and carefully threaded an ethernet cable through it and into the inside of the Apple IIGS. I then plugged that cable into the RJ-45 connector on the Uthernet II and plugged the other end of it into the Happy Macs lab network switch. Finally, I used the Slots control panel to set the Uthernet II slot to “Your Card” and restarted.
All was well. The machine booted successfully and I was able to check that all the right indicator lights on the Uthernet II were lit, indicating that a solid 100 Mbps connection had been established between the Uthernet II and the network switch. Great! It was now time to return to the software side of things.
This was a total joy, and I don’t say that often about installing software! The Uthernet II shipping package included a one page Quick Start guide which included a “Software” section that told you exactly how to install the Marinetti software. There were only three simple steps (run the installer, copy the TCPIP file into System:System.Setup and copy the UthernetII file into System:TCPIP). That was it! Restart and enjoy? Well, not quite, but almost. Once restarted, there was the usual TCP/IP configuration that had to be done via the new TCPIP control panel (gateway address, enable DHCP, etc.) and another restart needed. Once that was done, the whole task was done. The Apple IIGS was on the internet… I think!
That was the problem. I think the IIGS was on the net, but there was no sign of it, and no helper apps like MacTCPPing to test it out with. There wasn’t even anything that would tell you what your IP address was! This seemed rather like going to a lot of work to build the world’s best car, only to discover that there was no instrument panel to monitor it with and no pedals to control it with!
I went back to Google looking for Marinetti applications, and ultimately found GW_FTP, SAFE2 FTP and something called Spectrum, which after examination didn’t seem like what I was looking for. As I write this post, I have yet to try these applications, but I DID find two other applications that were installed by Marinetti, a web server and a Telnet program. I did not need a web server, but I tried it (Casper) anyway just to see if it worked.
It did! Not only that, but Casper also told me what my IP address was and the path from which it was serving files. Using the Teach application on the IIGS, I quickly hacked together a small welcome.html file and put it into the directory Casper was serving content from.
Then I moved over to one of the Macs in the lab (in this case my trusty PowerMac G5 Dual). First I pinged the IP address that Casper had given me and was gratified to see a continuous set of ping responses. My IIGS really WAS on the Internet. Then I pointed a web browser at the same address and was beyond pleased when the “Welcome to IIGS” message from my welcome.html file appeared on screen.
So there you have it. A IIGS now on the Internet. The job is not quite done however. I did not title this post “Networking an Apple IIGS” because while my IIGS is on the Internet, it is not on the Happy Macs lab internal AppleTalk network. I have read lots of confusing and contradictory material on how to achieve this, but nothing that has led anywhere useful yet. The apparently “typical” answer, AFPBridge, simply doesn’t seem to work against any of the Macs I have in the lab, and so the search for a networking solution continues.
In summary, to put your Apple IIGS on the Internet, get a Uthernet II card, get the Marinetti TCP/IP stack and then simply follow the included instructions. A2 Retro Systems and Marinetti are to be congratulated on a job well done. Minus my now resolved confusion about how to deal with .po files, it all “just worked”. I hope that you may have similar smooth sailing!