In the first post of this series on the SyQuest EZ-135 “super floppy”, I examined the backup problems presented by the rapidly growing capacities of hard drives in the mid 1990s, and charted the rise of the “super floppy” – drive and cartridge systems with capacities in the 100 MB range per cartridge, which dramatically simplified the task of keeping precious hard drive data backed up.
I zero’d in on the SyQuest EZ-135 super floppy, which has largely faded from the public consciousness, and presented a device that for all intents and purposes seemed superior to the Iomega Zip-100 system that ultimately dominated the field. I acquired a set of EZ-135 drives and cartridges on eBay to learn more about these devices, and in this post I present my experiences installing the software and the hardware onto my Mac OS 8.6 Power Macintosh 7500/366.
Unboxing
The unboxing experience has become a “thing” these days, courtesy of Apple’s frequently exquisite packaging of their new products, and the results are often recorded and presented in detail. My EZ-135s came from eBay of course, packaged by the shipper, and so perhaps unboxing is not a particularly key experience, but first impressions are lasting, and so as I unpacked the package my EZ-135’s arrived in, I made note of my immediate impressions, and present them below:
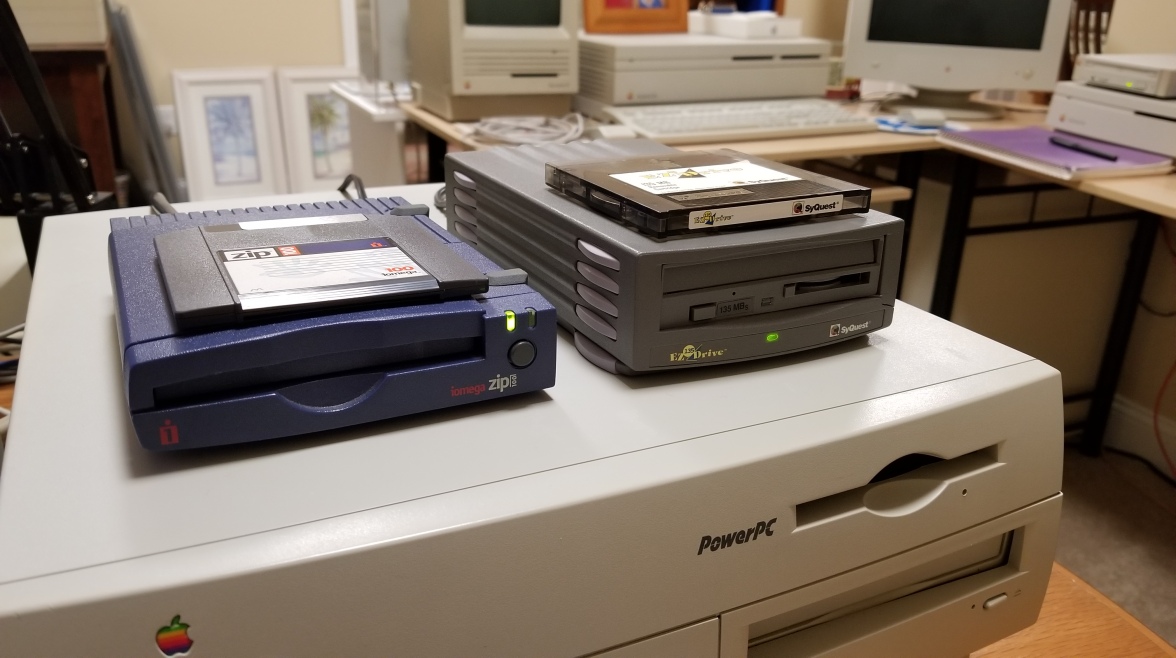
- The EZ-135 Drive: The drive is definitely much larger than the equivalent Zip-100 drive and probably twice as thick. It is not unpleasant looking, but definitely much chunkier than its Iomega counterpart. To get a sense of this, compare the two in the picture below:

- The EZ-135 Cartridges: The cartridges are see-through in places and they seem to “rattle” when handled, as if the platter was loose inside. This did not create an immediate impression of solid quality, and the garish yellow font used on the cartridge’s EZ-135 labeling did not further enhance my overall impression of them. Finally, the cartridges are marginally larger than their Iomega competitor, perhaps in keeping with their larger capacity!


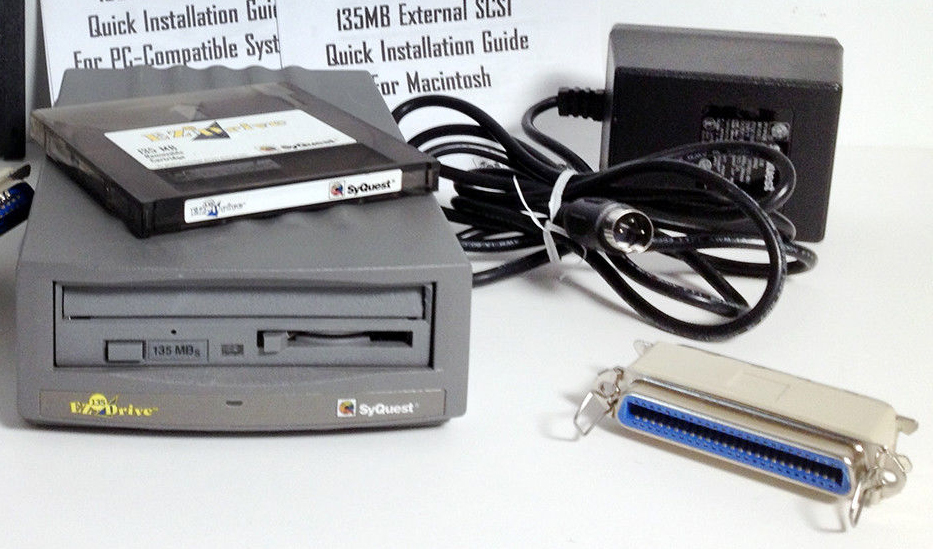
- The Power Brick: Enormous! Relative to pretty much any other power brick for any other product, the EZ-135 brick is huge… and heavy. I am not sure what to think the reason might be for this, but I noted right away that tucking this monster out of sight would be a challenge. In the image below, evaluate the size of the power brick relative to the size of the drive itself!
All in all, my initial impressions were less than 100% favorable, but operation and performance are what really count, so onward I went.
Installing the Software
The supplied software came on three floppies, all of which were for DOS/Windows. The label of the first floppy had a line in small font near the bottom instructing Mac users to access the Mac files via PC Exchange. This likely saved SyQuest the cost of an extra floppy per product sold, at the expense of making it clear that they did not consider the Macintosh platform to be a key market for them.

Since I am on the Macintosh platform however, I popped the floppy into my Power Macintosh 7600/366 (a 7500/100, accelerated with a Newer Technology G3 card at 366 MHz) running Mac OS 8.6, and despite being DOS formatted, it immediately mounted on the desktop, revealing an entire diskette worth of dozens of Windows files (.bat, .sys, .com, .exe, .etc!) and a Mac folder containing just three files, one of which was a “readme”. Life is easier on the Macintosh platform! 🙂
I copied the three files across to the Mac’s hard drive and ejected the floppy. The three files were (1) a “readme” file, (2) a SyQuest utility called whatscsi.id (how very DOS 8.3!) and (3) the drivers and utilities themselves, all in a single file called mac.sea.
I executed the whatscsi.id utility, it scanned my Mac’s SCSI bus and displayed all of the free SCSI IDs on the bus. It recommended “2” for the EZ-135 drive, but I selected “6” instead, which was also free, for the simple reason that it was already selected on the SCSI ID switch on the back of the drive!
I then executed the mac.sea file and it quietly and very quickly installed the necessary software. Now it was time for the hardware.
Connecting the Hardware
Setting up the hardware seemed simple enough: a drive, a power brick and a SCSI cable. All three were provided with my purchase and plugging them all together did not require a rocket scientist. But wait… What about SCSI termination? Anyone who has worked with external SCSI devices knows that the SCSI chain has to be electrically terminated in order to work successfully. Pretty much every SCSI device I have ever worked with has a switch of some sort on the back, usually near the SCSI connector, that allows an internal termination to be set to “on” or “off”.
Not so with the EZ-135. No switch was to be found. Instead, if termination is required, the 2nd SCSI port on the back of the drive must have a SCSI terminator block plugged into it. Now the drives I bought on eBay came with these terminator blocks, but I cannot say if the original retail box included them or not. The ones I received were not SyQuest branded, and so I am just a bit suspicious. It was a curious design decision on SyQuest’s behalf to omit the customary termination switch and hardware. Like the omission of a Macintosh-specific floppy, it suggests to me a product team that was working very hard to fit the retail offering into an overly aggressive price point for the actual product cost.
Setting that concern aside, I plugged it all together, termination and all, powered up the empty drive (no cartridge yet) and booted the Macintosh. When Finder presented itself, I found the newly installed SilverLining Lite control panel and launched it. It detected the EZ-135 right away and correctly declared it to be on the external SCSI bus at ID 6. So far, so good.

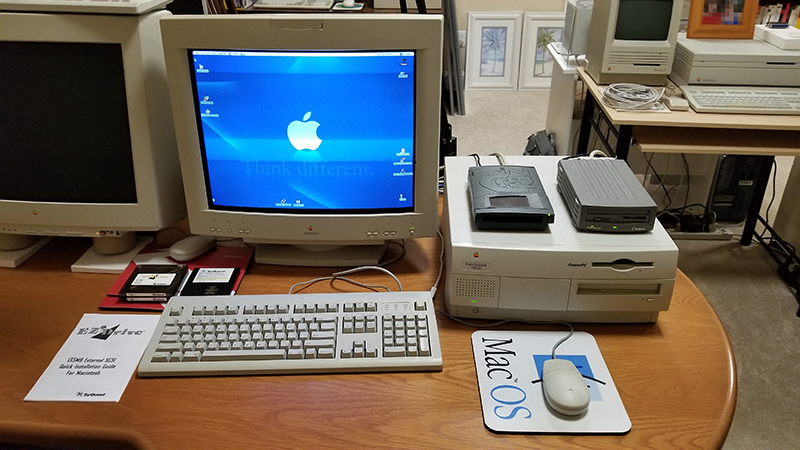
Here is my test environment at this point (with the original Iomega Jaz that was on the external SCSI bus still present but unplugged):
Initial Testing
It was time for the moment of truth – would an inserted cartridge mount on the desktop or not? I inserted a cartridge into the drive slot and pushed it fully in. There is a little mechanical lever underneath the drive slot, labelled “Load/Unload”, that has to be slid fully to the right to lock the cartridge into the drive. I did this and the cartridge immediately spun up. Almost like magic, it popped onto the desktop, just as you would hope it would.
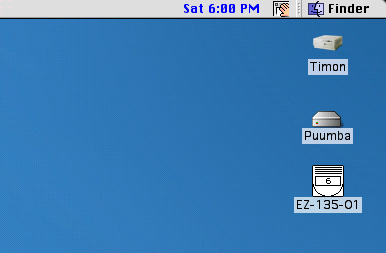
Of course the cartridge turned out to be DOS-formatted and so my first real work with the EZ-135 was to format the cartridge as Mac OS Standard. SilverLining Lite happily provided the functionality needed, and in a few minutes, the cartridge was now Mac-friendly. This is what it looked like mounted on the desktop. Notice the helpful little touch of embedding the SCSI ID in the icon – nice!
I did some basic tests, copying files to the cartridge and then from it, and all seemed well. Next up then was to test the unmount and eject procedures, which I had read in one contemporary review were more involved than with their Iomega competitor. Not so! I dragged the EZ-135 icon to the trash and the drive immediately spun down and popped the Load/Unload lever partly to the left. The lever then had to be slid fully to the left, which mechanically ejected the cartridge part way out of the slot, at which point it could be grasped and pulled completely out. It was all very easy and very intuitive.
Just now however, a glitch occurred that has not repeated itself since. I will report it nonetheless, just in case it should happen to you. An apparent artifact of reformatting the cartridge was that I ended up with two EZ-135 icons on my desktop, one representing the original DOS-formatted instance of the cartridge, and the other representing the Mac-formatted instance. Prior to the above basic testing, I had dragged the DOS “ghost” to the trash and it had disappeared. I was able to do my tests and eject the drive without issue, but I suspect that the DOS “ghost” was in fact the artifact of a bug in the drivers, and the Mac was now compromised.
I say this because when I inserted the cartridge into the drive again, to see if it would just as seamlessly remount on the desktop, that ghost, or something anyway, came back to haunt me. I put the cartridge into the drive, slid the Load/Unload lever over, the cartridge spun up and then… Finder crashed! I was presented with a dialog to that effect and I could not clear it. When I pressed the OK button, Finder would restart, re-crash, and re-present the dialog. I ran through this loop several times to ensure that it was not transient, and it was not. I even manually spun down the cartridge and removed it, but Finder stubbornly remained in its crash loop. Finally, I had to unplug the power to the Macintosh to accomplish a restart.
This has never happened since, and perhaps was entirely coincidental, but I am making you aware of it for your future reference. Since then, I have been able to insert and eject EZ-135 cartridges at will, with no issues whatsoever. It has quickly become clear the EZ-135 system can be depended upon to reliably and quickly store and retrieve files to/from its cartridges.
Conclusions
With my Mac OS 8.6 initial testing as my reference, I can say that both the EZ-135 hardware and its supporting software worked intuitively and well, and that operation of the drive and its media followed a paradigm similar to that of floppy removable media: insert the media and it mounts on the desktop, drag the media to the trash and it unmounts and ejects.
It was thus time to put the drive to the most important test of all: performance. Would it live up to its advertised performance specs? Would it be faster than an Iomega ZIP-100? In the next post in this series, I will dig into this and learn how the drive and its cartridges perform in real world tasks.
Read on…